

In this in depth article, we will show you all the necessary steps you will need to take in order to setup port forwarding on your system for use with the internet. We will demonstrate where to find the necessary information about your system as well, and what you might have to change to configure this on your system.
Matching Router and DVR IP numbers
While configuring port forwarding, you must make sure that all the IP addresses are under your router’s IP address. What this means is that if your default gateway(router) is 192.168.1.1 (or 10.1.10.1) your home computer on that router will be something like 192.168.1.4, (or 10.1.10.2 or 10.1.10.5.) As long as the first three numbers separated by periods are the same as your router’s IP. You need to make sure that your DVR is configured to be under the router’s IP address.
To determine what IP address your router is, the best way to access this information is to bring up the command prompt on your home computer. Search “CMD” in the program search bar or for mac users, it is called “Terminal.” Once there, type in the command “ipconfig” without the quotations or “ifconfig” for mac users and hit enter. This will bring up a window of crucial IP address information.

Scroll through to find “Default Gateway” which is your router IP address. Compare to the DVR IP address and change it on the DVR if needed.

Newer model DVR
Whether you have new or old model DVR’s, you will be able to find system information that is crucial to port forwarding. This information includes your DVR’s IP address, and the default gateway of your system. The default gateway is your network’s router. Everything must be connected to the router and under it’s IP address to configure Port Forwarding. Also make sure you have a Cat5 cable running from the router to the DVR and a separate cable running from the computer to the router.
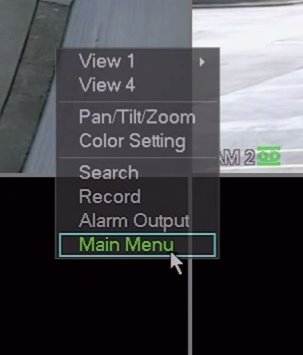
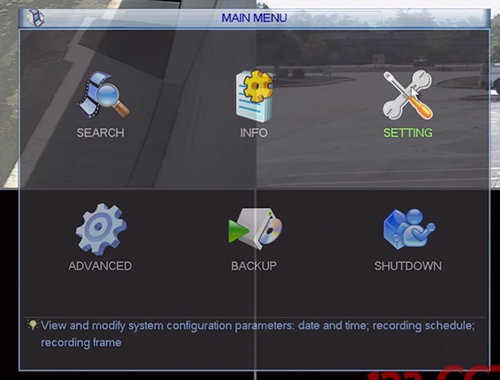
Right clicking on the DVR brings up the menu, from there you can go to the bottom where it says Main Menu

Click here, then at this menu click on the Network icon at the bottom.
![]()
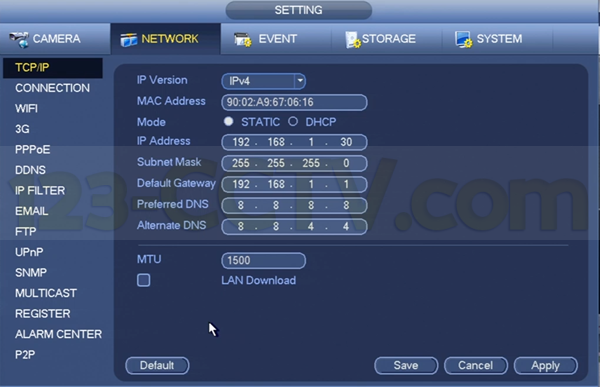
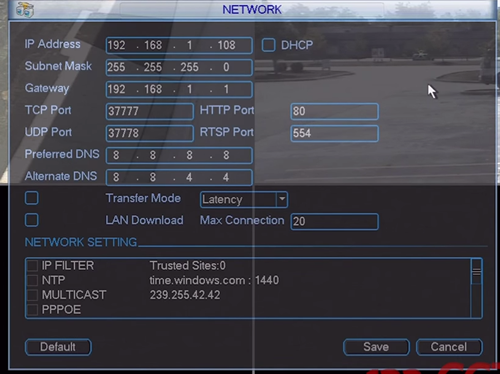
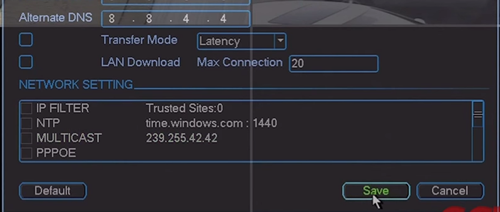
This is the main area where you will find your network information. Make sure your DVR’s IP address is compatible with your router’s IP, otherwise this will hinder the port forwarding.
The first tab is TCP/IP. This shows your IP address for the DVR, the Default gateway for your network, and other important information. To change any of these, just click on the address you need to change and put in the new address. This Is important when matching up your DVR with your network. Make sure to always save your information.
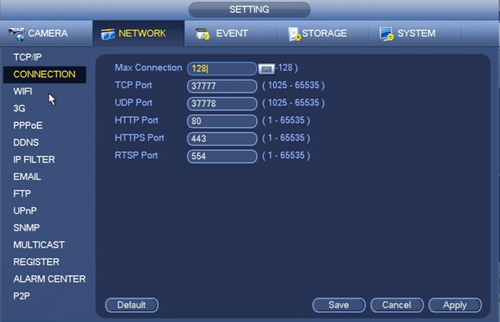
The Connection tab on the side will bring up a list of your port numbers. Here you can change the port numbers as needed to avoid conflict with other services on your network. By clicking on the number you are then able to change it to whatever you need. The two main ports you need to be concerned with when configuring Port Forwarding is your TCP PORT and HTTP PORT.
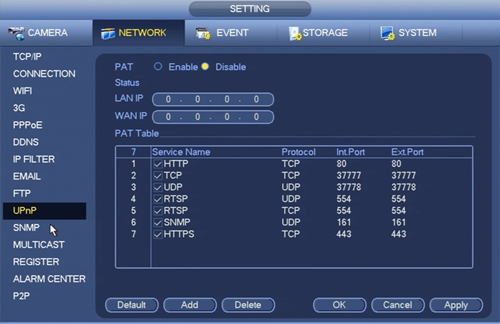
Finally accessing the UPnP tab on the side will show you a list of active ports working with your DVR.
Older model DVR
Changing the needed IP addresses on older style DVRs is very similar to the new style DVRs. Accessing the menus is slightly different but still easily laid out for you to find.
Right click on the home screen to bring up the menu, from there go to the bottom where it says Main Menu.
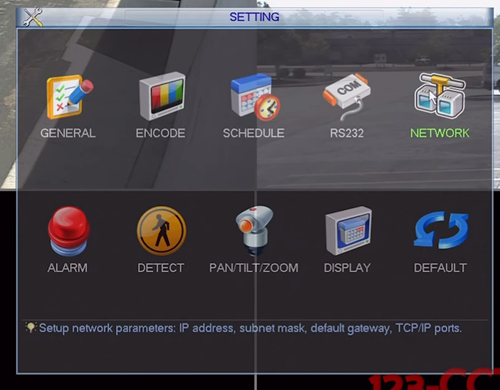
From there go to Settings -> Network.
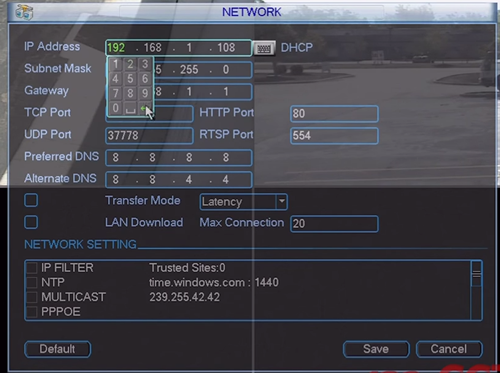
This is the main Screen for all your IP information. You will see the IP address of your DVR, the default gateway(your router IP), what you have your TCP Ports and HTTP ports configured to, really all your main information for port forwarding. Here you can change the IP addresses and ports if needed. By clicking on the IP address bar you will be able to change the IP address. This goes for all addresses on this screen.

Router
To log into your router, you will need to access it via your internet browser. You type the IP address into the address bar to bring up router login. Your router’s IP address is normally 192.168.1.1, but can be 10.1.10.1 or any other IP address based on the physical router model and your internet service provider. At the login screen, type in the credentials, your username and password, to gain access to the router.
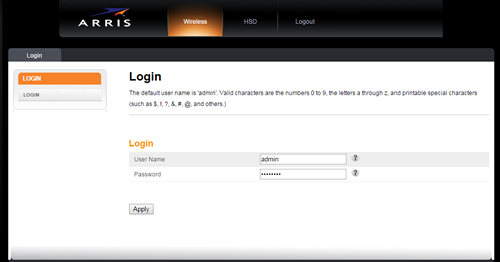
If you do not know your router’s login credentials there’s a few things you can do. First thing is if you can to see if it’s printed on a label on the physical router itself. If the router is from your ISP and you have not changed the password, you can call your ISP and ask them for the login information. Otherwise, if you purchased the router from a third party like an online seller, you can google the make and model of the router and look for the default login information.
Once you are logged in, go to the Firewall tab on the top bar to bring up the firewall tabs and main screen. What you are doing when you are setting up port forwarding is making a doorway into your network that you can access from an external internet service such as your phone or a computer not located on your network. This is important to understand you can grasp the basic concept of what you are configuring.
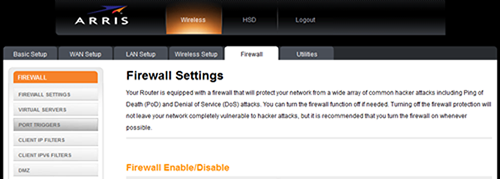
Under the Firewall tab on the left hand side, you will see a selection Virtual Servers.
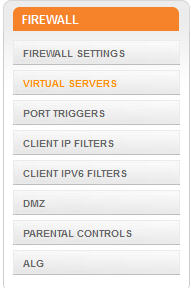
Here you will see a list of the port rules you already have in place. Click add to make a new port rule.
This brings up this menu:
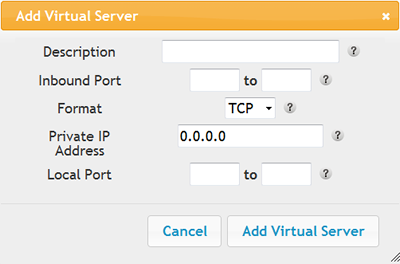
You will need to create two rules for port forwarding to be successful for your system. A rule for Port 80, and a rule for Port 3777.
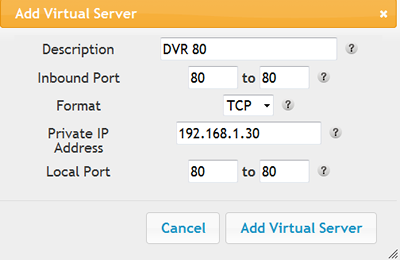
First make a rule for Port 80. Type in a name you will remember in the Description box so you can remember later what this rule was created for. Something like “DVR 80” or “DVR 37777” is suggested. For both Inbound Port and Local Port, you will type in the port number you are creating the rule for. So for Port 80, on Inbound Port put, 80 to 80, and Local Port, put 80 to 80. Format should be left on TCP, and lastly, Private IP Address should be the IP address of your DVR. This you can find in the DVR as already mentioned.
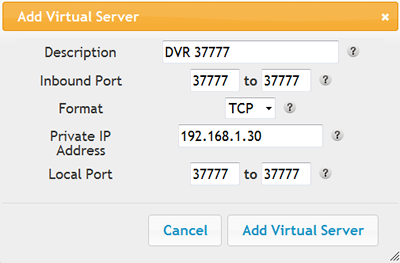
Follow these same instructions and make another port rule for Port 37777.
GRC
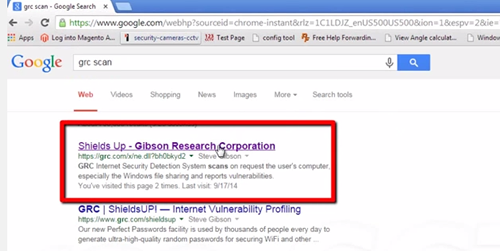
After setting up these port rules to configure port forwarding, it is advised to use a service called “GRC” to scan your ports and see that the ports you just configured are open. This will ensure you created the ports rules correctly and that everything should work properly when you go to access your system online. GRC is an online service, you only need to go to the website to scan your ports.
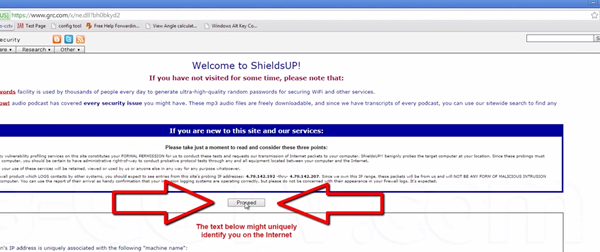
Google “GRC Scan.” The first listing should be the correct website.
Read the disclaimer and Click the “proceed” button to continue to use the service.
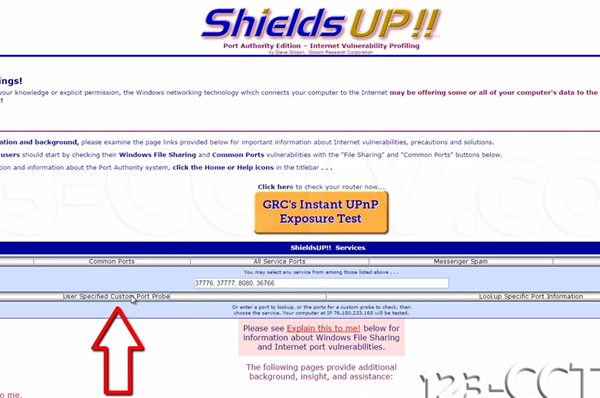
Then type solely the port number associated with the created port rules into the text bar, not the name that you gave these rules. (80, and 37777) You can type multiple ports into the text bar to scan multiple ports at a time, just separate them with a comma.
After typing the port numbers into the text bar and initiating the scan, GRC will tell you the status of the ports in question.
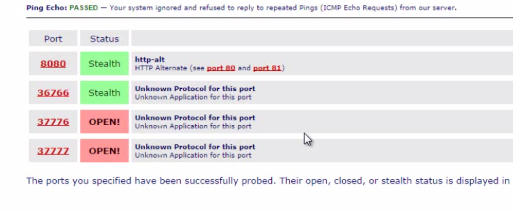
“Open” status means the port rules were created properly, and if you see open for both the port rules you created then your port forwarding is configured and you are finished. Everything should work properly after this.
“Closed” status means the rules were created improperly and you will have to go back to the router login and determine where you went wrong in your setup. This could be a result of another service on your network using that port already or another type of conflict.
“Stealth” status means that for whatever reason, this port is being blocked by your internet service provider. The only way to fix this issue is by calling your ISP and resolving the issue with them before the port rules will be enabled.

If all these steps have been followed and your Port rules were created properly, you should now be able to access your system online for live camera feed.
Anthony Berlin
Latest posts by Anthony Berlin (see all)
- Dummies Guide To Remote Viewing Security Cameras - November 5, 2018
- How to add IP cameras and HD Cameras to your Hybrid DVR - May 17, 2016
- How to change the order of IP cameras connected to your PoE NVR - February 29, 2016