

Configuring Video Picture Snapshots
Snapshot is another feature along with record on your DVR. This feature allows you to take images instead of full recordings for whatever your needs might be. This is a less memory intensive option with your system, and allows you to have precise images of an intruder or anything else that is easy to save and share.
You will find most of the configuration settings for the snapshot feature in the same areas where the record settings are if you are already familiar with those menus. First off, to set the schedule for snapshot is almost identical to the steps to set up general record. You would use this if you only want to take images between certain times of the day, or you could also set snapshot to motion detection, enabling you to have pictures of someone coming into your business during closed hours.
Setting your snapshot schedule
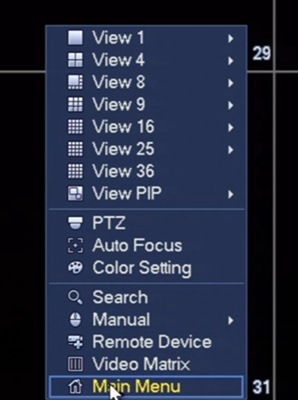
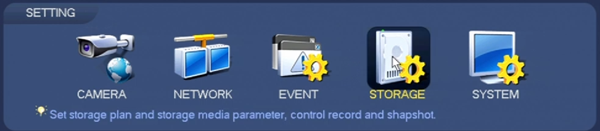
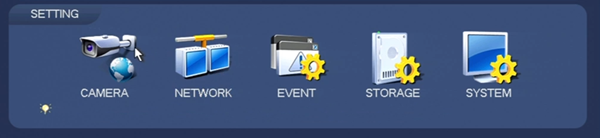
For scheduling, you would go to Settings -> Storage -> Schedule. There is separate tabs for record and snapshot, so make sure you have snapshot selected.
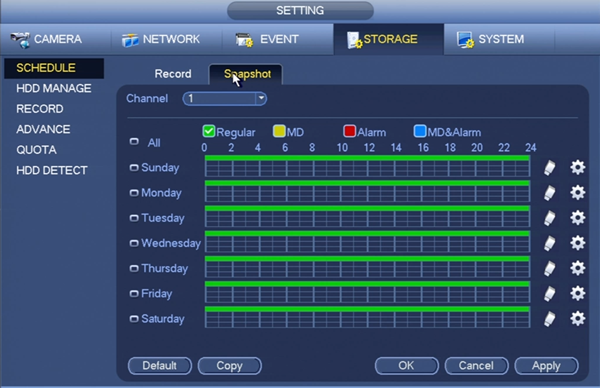
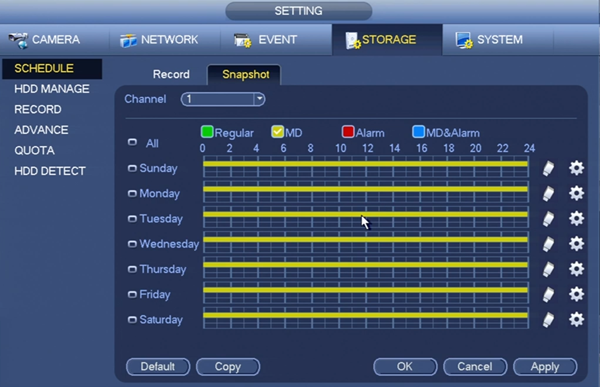
From there you have the option to set this feature for certain days, hours and motion or general recording. To playback the snapshots you have taken, you would go to the same menu you access for general recording playback. To get there, access Operate -> Search, to bring up the time graph. Make sure in the top right corner you have pic selected instead of rec to access the snapshot specific graph. From there you play back the same way you normally would for recordings.
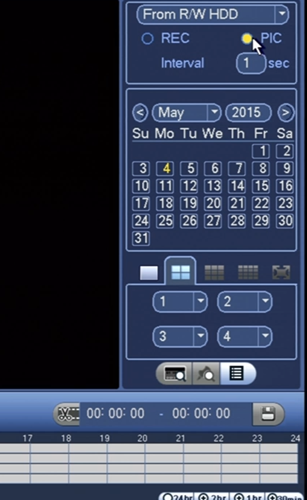
Further into playback for snapshots, you have a file list icon in the bottom right corner that will bring up a list of snapshots taken instead of searching for a specific one on the graph, making it easy to organize the snapshots and transfer the specific snapshots you want.
![]()
You can also choose specific cameras and channels to view, and if you take multiple snapshots in a period of time, you can playback the snapshots in a semi fluid manner to see a timeline of the subject that was photographed. There is also a time interval setting to determine time between images in the playback feature for even more control.
Snapshot image settings
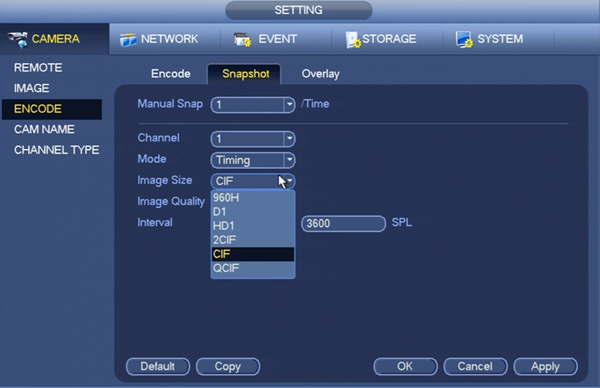
There is a separate section you can access that controls the quality of the snapshots you are taking. By going to Settings ->Camera ->Encode -> Snapshot you will bring up this menu.
There is different options controlling different aspects of this feature. You can control the settings for individual channels, and the image size, specifying how big the actual files will be.
There is an image quality tab from 1 to 6 with 6 providing the best image quality possible with your system. Also there is an interval tab for specifying how long between snapshots you want your system to wait.
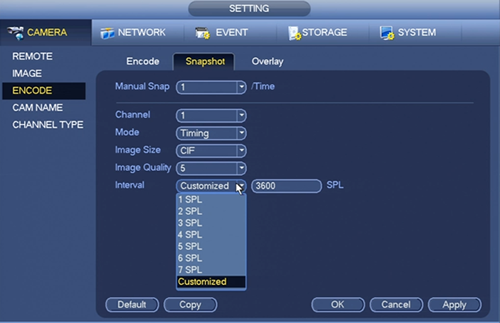
There is the option for 1-7 seconds and a customized setting for up to a 3600 second wait. As always, make sure to save your settings when you are finished.

Sam Venzetti
Latest posts by Sam Venzetti (see all)
- Motion Detection based Recording on your DVR and NVR - September 1, 2015
- Recording Camera Snapshots on your DVR - May 29, 2015
hay sam have you an email? i want to asking about cctv snapshot